
CityTrace START GUIDE
From maps to Minecraft
building data:
a step-by-step guide
Learn how to create map-based data for Minecraft Java Edition and import it into your world.
GSI tiles(processed)Source detailsUpdated: September 27, 2026
BEFORE YOU START
What you can do and what you need
For Java Edition. Depending on the format, you need WorldEdit or editing permissions.
A starting point for blocks and building placement
- Building footprints, heights, and floor counts
- Roads, water, green spaces, and mapped trees
- Estimated heights for buildings without recorded height data
- Automatically generated walls, windows, and roofs
- Slopes and hills with elevation enabled (interpolated from Japan's 5m and 10m elevation data)
Not an exact reproduction of the real location
- Interiors, floor plans, window positions, and exterior colors
- Roofs, signs, traffic lights, and shop names
- Photographic appearance and decoration
- Relief finer than the elevation data, bridge structures and building foundations
QUICK START
Select an area and generate data
For your first try, use 100–300 m, 1 m = 1 block, and Standard quality.

Choose a location on the map, check your settings, then generate the data.
- 01Select an areaMove the map to your location
- 02Choose settingsSelect scale, quality, and export format
- 03Generate and saveDownload the finished data
- Find the area by searching for a place
Use search or move the map.
- Select the generation area
Check the area, distance, and block count.
- Choose scale, version, and quality
Start with 1 m = 1 block and Standard quality.
- Review roads, water, windows, and other options
Enable only what you need. Be careful with clearing terrain.
- Click “Generate Minecraft data”
If the area is too large, reduce it and generate in sections.
- Choose an export format and save
For WorldEdit, use
.schem; for vanilla Minecraft, use a data pack. - Check in a copy of your world
Check position and orientation before using the main world.
SETTINGS
Choose format, scale, and quality
If unsure, start with Standard.
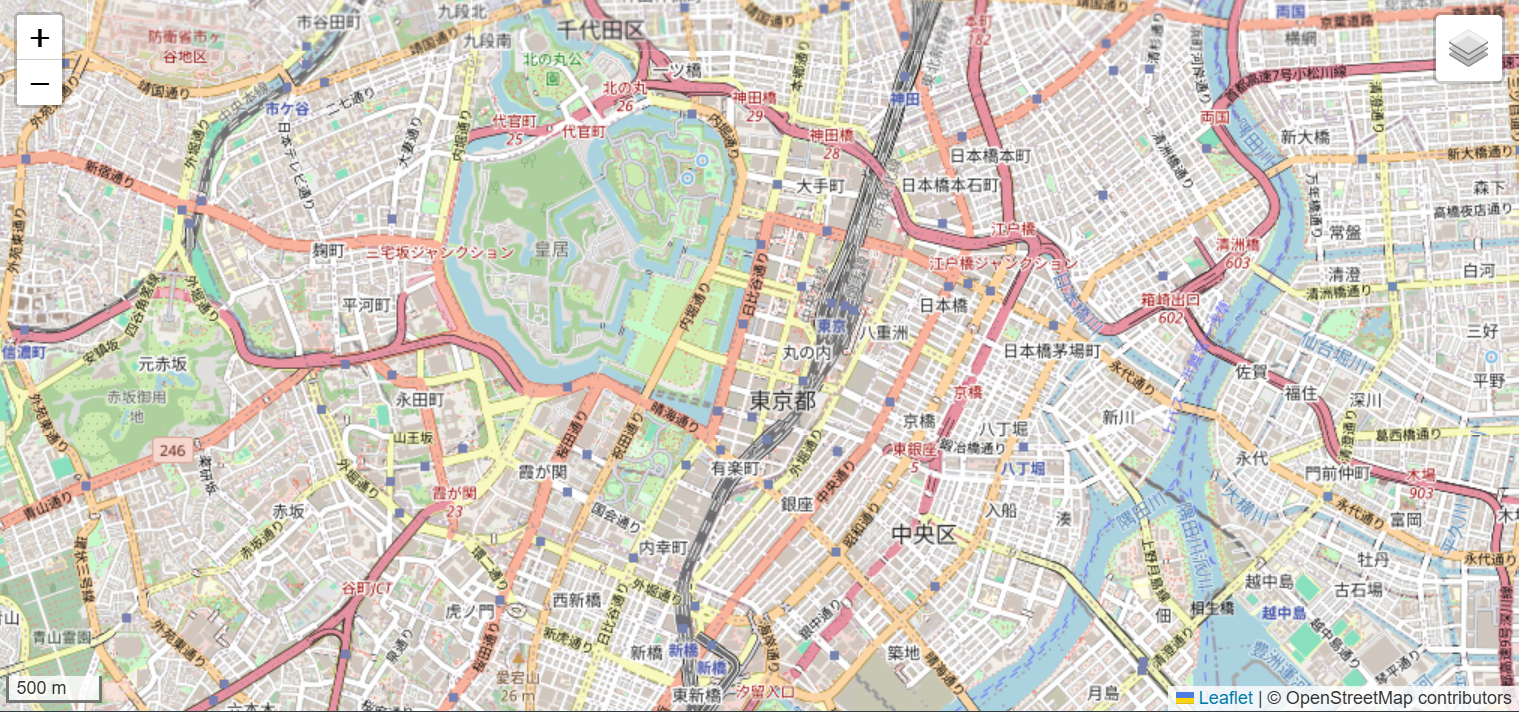
Once the town is visible, zoom in and out to check buildings, roads, and water before choosing your area.
Export format comparison
Scroll horizontally to see all columns
| Format | Suitable environment | Key features | Limit |
|---|---|---|---|
| .schem | WorldEdit/FAWE | While the WorldEdit history is retained,//undois available. A separate backup is still necessary. | Up to 4,096 blocks per side, with additional area, height and device-memory limits. |
| Data pack | Vanilla Java Edition | No mods required. Cheats or operator permissions are required. | 1,024 blocks per side; up to 400,000 commands (200,000 on some devices) |
Scale comparison
Scroll horizontally to see all columns
| Setting | Output size | Suitable use |
|---|---|---|
| 2 m = 1 block | About half the real-world size | Checking the layout of a large area |
| 1 m = 1 block | Base scale | First attempts and general town building |
| 1 m = 2 blocks | About twice the width and height | Enlarging a small area |
| 1 m = 4 blocks | About four times the width and height | Enlarging a small area further |
| 1m = 8 blocks (experimental) | Approximately 8× width, depth and height | Start with a small area of 50–100m |
8× scale, elevation and large-area mode
A 512m square becomes 2,048 × 2,048 blocks at 4×, or 4,096 × 4,096 at 8×. Even within the dimension limit, generation may fail due to area, building height, memory or output-format limits. A larger scale does not improve the source data's accuracy and also increases building and terrain heights, so check the destination world's build height.
Enabling real-world elevation generates slopes and hills from GSI 5m and 10m elevation data. Heights use the chosen scale relative to the area's minimum elevation. Foundations, bridges and watersides are approximations; this does not accurately reproduce geology or snow cover.
Generation stops if elevation data is missing or terrain and building heights or capacity exceed limits. It does not automatically flatten terrain or compress heights. Reduce the area or scale, or turn elevation off and try again.
Large-area mode for desktop is experimental: it retrieves map data in sections and combines it into one .schem file. It is not unlimited; area, retrieval volume and output capacity limits apply. Elevation generation has stricter limits. Follow the on-screen guidance and start small.
When publishing outputs or images using elevation, include attribution and a processing notice for GSI as well as OpenStreetMap.Elevation data sources and usage conditions.
Focus on layout
Fewer decorations for checking larger areas.
Balance size and detail
Adds features such as pillars and sidewalks.
More automatic decoration
Adds roofs, trees, and storefront details.
Landscape detail
Fills in streams, parks, and woods using inferred detail.
Supported versions: 26.2 / 26.1.2, 1.21–1.21.11, 1.20.1–1.20.6, 1.19.3–1.19.4, and 1.18.2 / 1.17.1 / 1.16.5 / 1.15.2 / 1.14.4. Select the version in the app and test in a copy of your world.
WORLDEDIT / FAWE
.schem import into WorldEdit
Placement is relative to where you stand. Test in an empty area.
map_build.schem: save the fileUse the save button after generation and choose
.schemformat.- Move it into the schematics folder
For Fabric / NeoForge, use
.minecraft/config/worldedit/schematics/; for Paper / Spigot, useplugins/WorldEdit/schematics/. - Move to a copy of the world or an empty area
Stand at the intended paste location.
- Load the schematic
//schem load map_build - Paste it
//pasteIf something is wrong, immediately use
//undoto undo.
For WorldEdit operation details, also see the official WorldEdit clipboard and schematic guide.
VANILLA JAVA EDITION
Install a data pack in your world
For vanilla Java Edition. Enable cheats in single-player, or use operator permissions on a server.
map_build_datapack.zip: save the fileUse the ZIP file as-is; do not extract it.
- Place it in the target world's
datapacksfolderBack up the world first.
- Load the data pack
/reload/datapack listto check. - Stand at the northwest corner of the build
The build extends east (+X) and south (+Z).
- Run the generation function
/function gmap:build
EXAMPLES
Example settings by purpose
Start with an example and adjust based on the block count.
Check roads and building placement
Around 300 m / 1 m = 1 block / Standard / roads on / .schem。
Enlarging a small area
100–200 m / 1 m = 2 blocks / Detailed / .schem。
Try it in separate areas
500–1,500 m / 2 m = 1 block / Simple or Standard.
Add a small area
100–300 m / 1 m = 1 block / Standard / clear terrain off.
TROUBLESHOOTING
Troubleshooting checklist
Check the area, file, and target version, in that order.
| Problem | What to check |
|---|---|
| No buildings found | Check the OSM data and retry with a smaller area. |
| Connection error / HTTP 429 | Wait before retrying, or try a smaller area. |
| Area too large | Reduce the area, scale, or quality and generate in sections. |
| Cannot save a data pack | Check the 1,024-block side limit and your device's command limit. |
/function not found | Do not extract the ZIP. Check its location, the version, and /reload. |
.schem does not appear in the list | Check the schematics folder, file name, and extension. |
| Terrain remains inside buildings | //paste -a is used, or clearing terrain is off. |
FAQ
Frequently asked questions
Does it work with Bedrock Edition?
No. Only Java Edition is supported.
Will it automatically recreate the exact real-world buildings?
No. It generates from footprints and heights. Finish the finer details yourself.
Can I generate a large city all at once?
Start with 100–300 m and split larger regions into separate areas.
What attribution is needed when publishing or sharing a generated world?
Display “© OpenStreetMap contributors” and license information.
Start with a small area
Start with 100–300 m, 1 m = 1 block, and Standard quality, then check the block count.